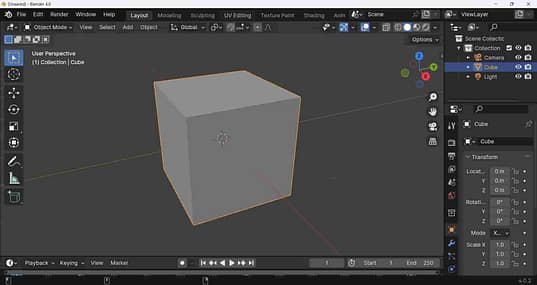
Blender is a powerful and versatile software that is widely used for 3D modeling, animation, and rendering. Originally it was developed as an in-house tool for a Dutch animation studio.
One of the main uses of Blender is for 3D modeling. With its robust set of tools and features, Blender allows users to create realistic 3D models of characters and objects. Whether it’s for video games, films, or virtual reality experiences, Blender’s modeling capabilities make it an essential tool for bringing creative visions to life.
In addition to modeling, It is also widely used for animation. Its intuitive interface and powerful animation tools enable users to bring their models to life with lifelike movements and expressions. From simple character animations to complex motion graphics, Blender provides the tools needed to create compelling and captivating animations.
Furthermore, Blender is a popular choice for rendering projects. Its built-in rendering engine, Cycles, delivers high-quality visuals with realistic lighting, shadows, and textures. Whether it’s for still images or animated sequences, Blender’s rendering capabilities allow users to showcase their creations in the best possible light.
Moreover, Blender’s versatility extends to other areas such as simulation, compositing, and video editing. It makes it a more comprehensive solution for various creative projects.
In conclusion, Blender is a multifaceted tool that is used for 3D modeling, animation, rendering, and much more. Its robust features, intuitive interface, and open-source nature make it a valuable asset for artists and creators seeking to bring their ideas to life in the digital realm. Whether it’s for professional projects or personal endeavors, Blender has proven to be an indispensable resource for a wide range of creative pursuits.
ब्लेन्डर क्या है ये प्रश्न जब कोई इंसान पूछता है तो मै उसे ये बात सकता हूँ कि ब्लेन्डर एक शक्तिशाली ग्राफिक्स और 3D मॉडलिंग सॉफ्टवेयर है जिसकी मदद से डिजाइनर, आर्टिस्ट बहुत सर डिजिटल कार्य कर सकते हैं। । इस सॉफ्टवेयर का उपयोग विभिन्न क्षेत्रों में किया जाता है जैसे कि वीडियो गेम्स, फिल्म निर्माण और एनिमेशन।
ब्लेन्डर का उपयोग मूल रूप से 3D मॉडेलिंग, रेंडरिंग, एनीमेशन और वीडियो संपादन के लिए होता है। यह एक ग्राफ़िक्स पाइपलाइन के साथ आता है जो की यूजर को विभिन्न आकारप्रदर्शन, बनावटों और प्रकाश प्रभावों की सुविधा देता है। इसका नियमित अद्यतन और प्रशिक्षण कार्यक्रम ब्लेन्डर को इंटरनेशनल तकनीकी सामरिकता में बनाए रखता है। यह एक कम्यूनिटी का हिस्सा है जिसमें लाखों डेवलपर्स, कलाकारों और वेब डिज़ाइनर्स शामिल हैं, जो नवीनतम उपयोग करते हैं, सुझाव देते हैं और ब्लेन्डर का विकास करते हैं।
एक महत्वपूर्ण विशेषता जो इस सॉफ्टवेयर को आकर्षक बनाती है है ये ओपन सोर्स है। यह मतलब है कि कोई भी उपयोगकर्ता इसे नि:शुल्क डाउनलोड और इस्तेमाल कर सकता है।
ब्लेन्डर का उपयोग करना सीखने के लिए, शुरुआती स्तर से उच्चतम स्तर तक कई ऑनलाइन संसाधन उपलब्ध हैं, जिनमे से कई उनके आधिकारिक वेबसाइट पर उपलब्ध हैं। यह उपभोगकर्ताओं के लिए मुक्त और उपयोगी होता है जो अपने कम्प्यूटर ग्राफ़िक
अब आपको ये पता चल गया होगा की ब्लेन्डर क्या है?
इसे आप यहाँ पर क्लिक करके डाउनलोड और इंस्टॉल कर सकते हैं।
In the world of 3D modeling, precision, and effective communication are key factors that can make or break a project. To ensure accurate and streamlined collaboration among artists, designers, and animators, Blender offers a powerful tool called Annotations. This feature allows users to make notes and drawings directly on the 3D viewport. It helps to convey ideas, provide feedback, and improve the overall workflow.
The annotations tool in Blender provides a set of intuitive drawing and editing options, empowering users to mark up their 3D scenes with sketches, diagrams, and written comments. Whether you are working on a complex architectural project, animation, or object modeling, this tool proves to be invaluable in visualizing concepts, refining details, and communicating ideas effectively.
The Annotations tool offers a range of brush types, including pencil, pen, and highlighter, each with adjustable settings for size, opacity, and color. This flexibility allows users to create various drawing styles and effects, enhancing the clarity and visual appeal of their annotations. Additionally, Blender provides unique brush textures, giving artists the ability to mimic different materials or create custom styles to suit the project’s requirements.
To facilitate precise annotations, Blender offers a variety of snapping options. Users can align their drawings to specific points on models, surfaces, or objects, ensuring accuracy and assisting in making measurements. With these snapping features, annotations become more than mere sketches, transforming into informative overlays that provide critical information for the modeling process.
what it supports:
Furthermore, the Annotations tool in Blender supports layers, enabling users to organize and manage different annotation elements effectively. By separating drawings and comments into separate layers, artists can easily toggle their visibility as needed, avoiding clutter and maintaining a clean workspace. This feature also allows for quick edits and adjustments without impacting the rest of the annotations or the underlying 3D scene.
One of the most advantageous aspects of Annotations in Blender is its seamless integration with other collaboration tools. Annotations can be easily saved as images or animations, making them readily shareable with team members or clients for review and feedback. This ability to export annotations as standard image formats ensures compatibility across different platforms, facilitating efficient communication and expediting the iteration process.
In conclusion, the Annotations tool in Blender serves as an indispensable asset for professionals working in 3D modeling. By providing a straightforward and versatile platform to sketch, comment, and annotate directly on 3D scenes, Blender enhances precision, communication, and collaboration. With a wide array of brush options, snapping capabilities, layer management, and export features, this tool allows artists to convey their ideas more effectively, resulting in better workflow efficiency and ultimately superior 3D projects.
स्नैपिंग का मतलब यह होता है कि दो ऑब्जेक्ट के बीच जब हमें अच्छे से कान्टैक्ट बनाना होता है । इसके लिए हम लोग स्नैपिंग का इस्तेमाल करते हैं । मतलब कहने का यह है कि एक ऑब्जेक्ट के ऊपर दूसरा ऑब्जेक्ट कितने अच्छे तरीके से अटैच हो सके। इसी को स्नैपिंग करना बोलते हैं। ब्लैडर में स्नैपिंग को ऐक्टिव कैसे करते हैं? स्नैपिंग को ऑन करने के लिए आपको दो तरीके मिलते हैं। पहले तरीके मे स्नैपिंग आपको ब्लेंडर डिस्प्ले के सबसे टॉप पर दिखता है । यहाँ पर आपको मैग्नेट वाला सिंबल दिखाई देगा। यही मैग्नेट वाला सिंबल स्नैपिंग है। इसको ऑन करते ही आपकी स्नैपिंग ऑन हो जाती है। दूसरा तरीका है :- जब भी आप किसी ऑब्जेक्ट पर स्नैपिंग अप्लाई करते हैं। तो उस ऑब्जेक्ट को आपको सेलेक्ट करना होता है। करने के बाद आप कीबोर्ड से “g” key को प्रेस करते हैं ताकि ऑब्जेक्ट को पकड़ सके। उसके बाद कंट्रोल प्रेस करके होल्ड रखते हैं । और उसके बाद आप ऑब्जेक्ट के ऊपर स्नैपिंग अप्लाई कर सकते हैं। Snapping in Blender refers to the process of aligning or connecting objects or elements within the 3D space with precision. This feature is extremely useful for accurately positioning and aligning objects, vertices, edges, and faces while working.
Different Snapping options:
There are different snapping options available in Blender, including vertex snapping, edge snapping, face snapping, and grid snapping. Each option allows the user to snap the selected elements to a specific point, edge, or face on another object, or to the grid. To enable snapping in Blender, you can simply toggle the snapping option on the toolbar . You can also use the shortcut key ‘Shift + Tab’. Once snapping is enabled, you can choose the type of snapping you want to use and adjust. Snapping in Blender helps in speeding up the workflow and ensures the accurate placement of objects and elements within the 3D space. It is an essential tool for precision modeling, animation, and layout design in Blender. In conclusion, snapping in Blender is a powerful feature that allows users to precisely align and connect elements. Whether you are working on architectural designs, character modeling, or animation, snapping can significantly improve accuracy and efficiency.
In the world of 3D computer graphics, Blender stands out as one of the most powerful and versatile software tools available. One such feature that beginners often come across is “object parenting.” But what exactly does it mean?
Object parenting refers to the relationship established between two or more objects in a Blender scene. By designating one object as the parent and another as the child, you establish a hierarchical connection that affects their movement, rotation, and scale relative to each other.
Parenting objects in Blender can be incredibly useful when creating complex animations or organizing a scene’s elements. For example, let’s say you’re animating a character’s body parts. By making the torso the parent object and attaching limbs, head, and other parts as children, you can easily move or animate the entire character as a cohesive unit.
The process of such parenting in Blender is straightforward and offers different options to suit your needs. To establish a parent-child relationship, you just need to select both objects, ensuring the parent is selected last. Then, with the objects selected, you can press Ctrl+P (or right-click and choose “Parent”) to reveal the different parenting options available.
Blender offers several types of object parenting, including Object, Bone, and Vertex parenting. Object parenting is the most common type, where one object controls the transformation of another. Bone parenting involves linking objects to specific bones in an armature, allowing for intricate character animations. Vertex parenting, on the other hand, lets you attach objects to specific vertices of a mesh, offering precise control for complex interactions.
In conclusion, object parenting in Blender establishes a hierarchical relationship between objects, enabling seamless movement, rotation, and scaling. It is a fundamental concept that empowers users to organize their scenes efficiently and create captivating animations. As you delve deeper into Blender’s intricacies, mastering object parenting will unlock new avenues for your creative endeavors.
Blender, the popular open-source 3D modeling software, offers users a range of powerful tools to create stunning visual effects and animations. Among these tools are the options to duplicate objects, commonly used for creating multiple copies or instances of an object within a scene. However, Blender provides two different methods for duplicating objects: duplicate and linked duplicate. Understanding the distinction between these two methods is crucial for achieving the desired results in your projects.
Duplicate: When you choose to duplicate an object in Blender, you create an entirely independent copy of the original. This means that any modifications made to the duplicated object will not affect the original or any other duplicates. Each duplicate retains its unique properties, such as position, scale, rotation, and material properties. Duplicates can be moved, scaled, and rotated independently, making them ideal for situations where you need distinct variations of an object.
Linked Duplicate: In contrast to duplicating an object, selecting the linked duplicate option in Blender creates a reference or instance of the original object. This means that any changes made to the linked duplicate will be reflected in all other instances of that object. Linked duplicates share the same mesh data, meaning they are essentially the same object with multiple positions in the scene.
So, when should you use them in Blender? The choice primarily depends on the specific requirements of your project. It is your job to select right software to work on Animation.Duplication in Blender is crucial for maximizing your workflow efficiency.
In conclusion, understanding this difference in Blender is crucial for the desired results in your 3D projects. Experimenting with these duplication techniques will undoubtedly unlock new possibilities in the world of 3D modeling and animation.
In the world of 3D modeling and animation, Blender is a widely used software equipped with a variety of tools and features. One of the fundamental concepts in Blender, and indeed in any 3D software, is the pivot point. The pivot point options in Blender refer to the point around which objects in the scene rotate, scale, and translate.
Blender offers several pivot point options that allow users to manipulate objects in different ways. The default pivot point in Blender is the median point, which is the average position of all selected objects. However, users have the flexibility to change the pivot point to suit their specific needs.
One of the commonly used pivot point options in Blender is the individual origins. When we select this option, each object or component (such as vertices, edges, or faces) has its own pivot point, allowing for independent transformations.
Another option is the 3D cursor, which allows users to set a specific point in the scene as the pivot point. This can be useful for precise positioning and manipulation of objects.
The active element pivot point option uses the pivot point of the actively selected object or component, making it easy to perform transformations based on a specific reference.
Other points in Blender include the bounding box center, which uses the center of the bounding box of the selected objects, and the cursor, which uses the 2D cursor as the pivot point.
Understanding and utilizing the different pivot points in Blender can greatly enhance the efficiency and precision of 3D modeling and animation projects. By choosing the appropriate pivot point option, users can have better control over the manipulation of objects, leading to more polished and professional results.
In conclusion, pivot point options play a crucial role in the workflow of Blender users, allowing for greater flexibility and control when working with 3D objects. Whether it’s rotating, scaling, or translating, the pivot points in Blender provide a powerful set of tools to aid in the creation of stunning 3D designs and animations.
Blender is a widely popular, free, and open-source 3D computer graphics software that allows users to create stunning visual effects and animations. Within Blender, one powerful tool that often confuses beginners is the 3D Cursor.
In simplest terms, the 3D Cursor in Blender is a reference point used for various functions and operations. In other 3D software, this point is often called the “origin point” or “pivot point.” However, Blender’s 3D Cursor goes beyond serving as a simple reference point and offers much more flexibility and functionality.
The 3D Cursor can be easily accessed and manipulated within Blender’s viewport. By default, it appears as a small, red, and white circular crosshair mark. You can think of it as a virtual 3D mouse pointer and you can position it anywhere in the 3D space.
Primary functions of the 3D Cursor in Blender
One of the primary functions of the 3D Cursor is to determine the location where newly created objects will appear. When you add a new object, Blender places it in the position of the 3D Cursor by default. This allows for precise and controlled object placement within your scene.
Additionally, the 3D Cursor serves as a pivotal point for transformations, such as scaling, rotating, and translating objects. By setting the 3D Cursor as the pivot point, you can perform operations precisely around it. It enables intricate manipulations and transformations.
Moreover, the 3D Cursor is not limited to a single position within your scene. You can reposition it freely by clicking anywhere in the viewport. This can be particularly useful for aligning objects, placing reference points, or measuring distances accurately.
Another amazing feature of the 3D Cursor is its ability to snap or magnetically attract to various objects, vertices, and edges within the scene. This snapping functionality makes it effortless to align objects or precisely position them relative to existing geometry.
Understanding how to effectively use the 3D Cursor can significantly enhance your workflow in Blender. It allows for precise object placement, accurate transformations, and effortless alignment of objects within a 3D environment.
In conclusion, the 3D Cursor in Blender is a versatile tool that offers reference and manipulation capabilities. It is essential for efficient 3D modeling and animation workflows. By mastering its functionalities, you can unlock a new level of control and precision in your creative projects.
Global Axis and Local Axis in Blender: Understanding the Basics
Blender, a highly versatile 3D modeling software, offers users numerous tools and features to create stunning artwork and animations. Among these features, understanding the concepts of the global axis and local axis is essential for effective modeling and manipulating objects within the software. In this article, we will delve into the basics of global and local axes in Blender.
Global axis in Blender:-
In Blender, the global axis refers to the coordinate system that serves as a reference for positioning and orienting objects in the 3D environment. It consists of three axes: X (red), Y (green), and Z (blue), representing the horizontal, vertical, and depth directions, respectively. The global axis remains fixed and constant throughout the entire scene, providing a consistent frame of reference for all objects within it.
Local axis in Blender:-
On the other hand, the local axis in Blender is specific to each object within the scene. It represents the object’s coordinate system and is aligned with its geometry or orientation. While the global axis remains fixed, the local axis can vary its orientation and position depending on how the object is transformed.
The local axis is crucial for precise modeling and manipulation of objects in Blender. When you select an object, Blender displays its local axis, helping you understand its current orientation. This ensures that any transformation, such as rotating, scaling, or moving the object, is relative to its local axis, allowing for precise manipulation.
To better understand the interaction between the global and local axis, consider the following scenario: You have a car model in your scene, and you want to rotate its wheels. By default, Blender uses the local axis of each wheel for rotation. Therefore, regardless of the car’s overall position or orientation in the scene, the wheels will rotate around their local axis.
However, you may also want to rotate the entire car as a single unit, maintaining its global position. In this case, you can switch to global axis mode, ensuring that the rotation affects the entire car by aligning it with the global axis.
summary:-
In summary, grasping the concepts of the global and local axes in Blender is essential for the effective modeling and manipulation of objects within the software. While the global axis provides a consistent frame of reference for all objects in the scene, the local axis enables precise transformations specific to each object. By understanding the interplay between these two axes, you can effectively create stunning 3D models and animations in Blender.
The object origin in Blender is a fundamental concept that is crucial to understanding and working with 3D models. In Blender, the object origin refers to the point in 3D space where an object is positioned, rotated, and scaled from. It is essentially the center point of an object, determining its location and orientation within the 3D environment.
The object’s origin is represented by a small orange dot within the 3D viewport, and it is also displayed as a small orange gizmo that indicates the object’s location and orientation. Understanding and manipulating the object’s origin is essential for accurately positioning and transforming objects within a scene.
Whenever we select an object, you will see that a small circle appears in the middle of the object. We call this the origin point. With the help of the location of this origin point, we can perform operations like rotation, scaling, and translation on the object in the scene.
One important aspect of the object origin is its role in the transformation of objects. When an object is moved, rotated, or scaled, these transformations are performed relative to the object’s origin. This means that the object’s position, rotation, and scale are all based on the object’s origin’s point of reference.
Additionally, the object origin also plays a significant role in modeling and editing objects.
Furthermore, the object origin is also crucial for animation and rigging in Blender. It serves as the point of articulation for objects, allowing them to be animated and rigged effectively.
In conclusion, the object origin in Blender is a key concept that influences the positioning, transformation, modeling, and animation of objects within a 3D scene. Understanding how the object’s origin functions and learning how to manipulate it is essential for working effectively with 3D models.
Animation is an exciting and dynamic medium that allows individuals to bring their creative visions to life. With the rise of digital tools and software, learning animation has become more accessible than ever. Blender is one of the leading software programs for animation.
Blender is a free and open-source 3D creation suite that is equipped with a powerful set of tools for animation, modeling, simulation, rendering, and more. Whether you are a beginner or an experienced artist, learning animation using Blender can open up a world of creative possibilities.
To start learning animation using Blender, it is essential to have a solid understanding of the basics. Familiarize yourself with the interface tools, as well as the fundamental principles of animation such as timing, spacing, and motion. There are plenty of online tutorials, courses, and resources available that can help you get started.
One of the best ways to learn animation using Blender is through hands-on practice. Experiment with creating simple animations, such as bouncing balls or character movements, to gain a better understanding of the software’s capabilities. As you become more comfortable with the software, you can gradually start taking on more complex projects and refining your skills.
In addition to practical experience, it is also beneficial to study the work of other animators and artists. Analyze their techniques and styles, and use them as inspiration for your projects. By studying different styles and approaches to animation, you can broaden your creative horizons and develop your unique artistic voice.
Furthermore, don’t be afraid to seek feedback and constructive criticism from peers and professionals in the industry. Join online communities and forums where you can share your work and receive valuable input from others. Constructive criticism can help you identify areas for improvement and grow as an animator.
Learning animation using Blender is a rewarding and fulfilling journey that offers endless opportunities for creativity and self-expression. By building a strong foundation of knowledge, practicing regularly, studying the work of others, and seeking feedback, you can develop your skills and confidence in animation. So, roll up your sleeves and dive into the world of animation with Blender – the possibilities are endless!
This website uses cookies to improve your user experience, analyze site traffic and serve targeted ads in accordance with our Privacy Policy.
We use cookies on our website to give you the most relevant experience by remembering your preferences and repeat visits. By clicking “Accept All”, you consent to the use of ALL the cookies. However, you may visit "Cookie Settings" to provide a controlled consent.
This website uses cookies to improve your experience while you navigate through the website. Out of these, the cookies that are categorized as necessary are stored on your browser as they are essential for the working of basic functionalities of the website. We also use third-party cookies that help us analyze and understand how you use this website. These cookies will be stored in your browser only with your consent. You also have the option to opt-out of these cookies. But opting out of some of these cookies may affect your browsing experience.
Necessary cookies are absolutely essential for the website to function properly. These cookies ensure basic functionalities and security features of the website, anonymously.
Cookie
Duration
Description
cookielawinfo-checkbox-analytics
11 months
This cookie is set by GDPR Cookie Consent plugin. The cookie is used to store the user consent for the cookies in the category "Analytics".
cookielawinfo-checkbox-functional
11 months
The cookie is set by GDPR cookie consent to record the user consent for the cookies in the category "Functional".
cookielawinfo-checkbox-necessary
11 months
This cookie is set by GDPR Cookie Consent plugin. The cookies is used to store the user consent for the cookies in the category "Necessary".
cookielawinfo-checkbox-others
11 months
This cookie is set by GDPR Cookie Consent plugin. The cookie is used to store the user consent for the cookies in the category "Other.
cookielawinfo-checkbox-performance
11 months
This cookie is set by GDPR Cookie Consent plugin. The cookie is used to store the user consent for the cookies in the category "Performance".
viewed_cookie_policy
11 months
The cookie is set by the GDPR Cookie Consent plugin and is used to store whether or not user has consented to the use of cookies. It does not store any personal data.
Functional cookies help to perform certain functionalities like sharing the content of the website on social media platforms, collect feedbacks, and other third-party features.
Performance cookies are used to understand and analyze the key performance indexes of the website which helps in delivering a better user experience for the visitors.
Analytical cookies are used to understand how visitors interact with the website. These cookies help provide information on metrics the number of visitors, bounce rate, traffic source, etc.
Advertisement cookies are used to provide visitors with relevant ads and marketing campaigns. These cookies track visitors across websites and collect information to provide customized ads.